Saturday, June 25, 2011

Bok Choy Salad

Bok Choy is one of those vegetables that I see in the supermarket, it's beautiful with it's deep green leaves and pristine white stalks.  I admire it and typically move on because other than stir fry, I don't know what to do with it.

This past week, I went out on a limb and bought a bunch with the intention of challenging myself to get outside my comfort zone and prepare a vegetable that was new to me.  While I do occasionally prepare stir-fry, I prefer to do my oriental dining in a restaurant.  I've gotta have some reason to eat out! 

Anyway, I found a recipe for a salad that I want to share with you that is easy and healthy using Bok Choy.  It is a great vegetable and totally useable, stalks to greens, so there is little waste and you get the advantage of all the healthy benefits!

Based on my experience, I'd suggest breaking off a chunk of the ramen noodles and tasting them first.  If they have been around a while, they develop a strong smell and taste and will ruin your salad.  So check them first and dump them and get some fresher ones if they smell or taste strong!

Bok Choy Salad

Ingredients:

1 medium head of Bok Choy, diced
1 bunch of green onions, chopped
1 3-oz. package of ramen noodles
1/2 cup chopped toasted almonds
2 tablespoons sesame seeds, toasted
Blackberry Balsamic Dressing (recipe below)

Directions:

  1. Wash and dice the Bok Choy.  I used the whole stalk, green leafy tops too.
  2. Clean and chop the green onions.
  3. Combine the Bok Choy and onions in a mixing bowl.  Cover and chill.
  4. In a small skillet toast the sesame seeds and set aside in a small bowl.
  5. Using the same skillet, toast the almonds and combine with sesame seeds.
  6. Break the package of ramen noodles into small pieces and combined with almonds and sesame seeds, stirring to mix.
  7. Before serving, combine the Bok Choy mixture with the noodle mixture.  
  8. Drizzle with just enough dressing to coat.  Toss to coat and serve.
    Raw Sesame Seeds
    Toasted Sesame Seeds
I keep ingredients separate since it takes me a few days to go through this much salad, and I used 1 tablespoon of dressing to 2 cups of the Bok Choy/Onions and 1/3 cup noodle mixture and assemble it as I need it for meals.

Note:  If the dressing isn't to your liking, take a look at the SaladDressing on my blog at http://whatscookingatcathys.blogspot.com/2011/06/salad-dressing.html, I think it would be great too, or choose a dressing that you like.  Whichever you choose, I don't think you will be disappointed.


I have a bottle of Blackberry Balsamic Vinegar from The Olive Tree, a local store owned by Mindy and David Riley.  It's located at 4949 W. 199th, Overland Park, KS.  Stop in and check them out if you are in the area!  If you are not in the area, you can check out their products and order online at http://olivetreekc.com.  They are a great source for olive oils and vinegars.

Blackberry Balsamic Dressing

Ingredients:

2 tablespoons finely chopped red onion
1 teaspoon garlic powder
1/2 cup Blackberry Balsamic Vinegar
2 tablespoons honey
1/4 teaspoon dried mint
1/2 teaspoon salt
1/4 teaspoon black pepper
1/2 cup extra virgin olive oil

Directions:
  1. Combine all ingredients except oil, mixing well.  Drizzle in the oil whisking constantly to emulsify.
  2. Refrigerate for at least one hour to allow ingredients to blend.  It will look like chocolate syrup.  Drizzle over salad, toss and serve.

And of course a photo of Maggie performing a "quality inspection"!


Tuesday, June 21, 2011

Smoked Turkey Sausage Pasta & Veggies

In effort to incorporate more healthy choices in my diet, I purchased some Smoked Turkey Sausage.  I don't recall what I had in mind when I purchased it at the grocery. However, a quick check of the veggie drawer and pantry resulted in this quick and tasty supper.  I used red and green bell peppers because that is what I had handy, but I think this would work equally as well with yellow squash, zucchini, broccoli florets or asparagus.

Smoked Turkey Sausage, Pasta & Veggies

Ingredients:

1 14-oz. package Butterball Smoked Turkey Sausage
1 green bell pepper, seeded, and thinly sliced
1 red bell pepper, seeded and thinly sliced
1 medium onion, thinly sliced
2 teaspoons olive oil
4 oz. spaghetti
1 tablespoon salt
1 teaspoon Mrs. Dash seasoning
1/4 cup fresh grated parmesan cheese

Directions:

  1. In a medium pan, bring water to a boil.  Add 1 tablespoon salt and pasta.
  2. Cook pasta until al dente, about 10 minutes.
  3. While spaghetti is cooking, heat 1 teaspoon olive oil in a large skillet over medium heat.
  4. Slice sausage into bite sized pieces and add to the skillet.
  5. Brown sausage and remove from the pan.
  6. Add remaining teaspoon of olive oil to the skillet.
  7. Add the sliced vegetables and Mrs. Dash seasoning to the pan.  Sauté the vegetables until they are tender crisp.
  8. Add sausage back to the pan and reheat.
  9. Drain spaghetti and add it to the skillet with the meat and vegetables.
  10. Top with grated cheese and toss to mix.
Serve in individual bowls.

Serves 4

Sunday, June 19, 2011

Cherry Hand Pies

Today is Father's Day and I'm nearly 500 miles away from my dad.  Like my dad, I am a pie lover.  When faced with a choice of desserts, I'll choose pie anytime over other options.  My Dad's favorite pie is Cherry.  So today, remembering my dad on Father's Day, I thought I'd post this recipe for Cherry Hand Pie, which I have adapted from Bon Appetit Magazine.  I'll have to make more for my next visit home!


Here are a couple of tips.

First be sure and use parchment.  Otherwise, you will have cherry pie filling all over your cookie sheet and it will be a bear to get off.  Think about how a regular pie sometimes runs over and if you have ever cleaned up one of those drip catcher thingymajigs, you know how difficult clean up can be.  Use parchment and avoid it!

Secondly, don't forget to brush the edges of your pies with the egg wash.  It will help the crimps to hold and help contain the filling.  I missed this step and while they still turned out great, they were a bit messy.

Hot from the Oven


Cherry Hand Pies
Makes 9

Ingredients:

1 1/2 Tablespoons cornstarch
1 1/2 Tablespoons cold water
2 cups fresh cherries, stemmed and pitted (or about 12 oz. frozen pitted cherries, unthawed)
2/3 cups dried cherries
1/2 cup sugar
1 teaspoon vanilla
1/8 teaspoon salt
1/2 teaspoon almond extract
1/4 teaspoon cinnamon
1 14 oz. package of puff pastry dough, thawed in the refrigerator
Flour (for dusting)
1 large egg white
1 Tablespoon cold water
1 1/2 teaspoons raw sugar


Chilling


Directions:
  1. Line a large rimmed backing sheet with parchment paper.
  2. Stir cornstarch and 1 1/2 tablespoons cold water in a small bowl and blend and set aside.
  3. Combine fresh cherries and next 6 ingredients in a large heavy saucepan.
  4. Cook over medium heat, stirring occasionally, until cherry juices are released, about 5 minutes.
  5. Add cornstarch mixture, bring to a boil, stirring often.
  6. Remove from the heat and cool to room temperature.
  7. Roll out both sheets of pastry on a lightly floured board to a rectangle of 18"x 15".
  8. Using a pizza cutter or sharp knife, cut the dough into nine 6x5 rectangles.
  9. Whisk egg white and 1 Tablespoon of water together for egg wash.
  10. Evenly divide filling among the nine rectangles.
  11. One rectangle at a time, brush edges with egg wash and fold dough over filling so that the short ends meet, forming a 5"x3" packet.
  12. Crimp edges with a fork to seal.  Using a sharp knife, cut a few slits in the top of the pie to vent.
  13. Place on the prepared baking sheet.  Repeat with remaining rectangles.
  14. Brush tops with egg wash, then sprinkle with raw sugar. 
  15. Refrigerate for 30 minutes.
  16. Preheat oven to 375 degrees F while the pies are chilling.
  17. Bake pastries until tops and bottoms are golden brown, 30-40 minutes.
  18. Let cool for 10 minutes on baking sheet.  Transfer to wire racks; let cool completely.


Nutritional Information

One serving contains:
Calories (kcal) 289.9
%Calories from Fat 37.0
Fat (g) 11.9
Saturated Fat (g) 3.2
Cholesterol (mg) 11.0
Carbohydrates (g) 41.1
Dietary Fiber (g) 4.0
Total Sugars (g) 21.4
Net Carbs (g) 37.1
Protein (g) 4.2
Sodium (mg) 247.3

Sunday, June 12, 2011

Taco Casserole


Taco Casserole is easy and yummy.  Someone gave me this recipe, and I have adapted it to my liking.  I was craving this yesterday but didn't have all the ingredients I needed.  The recipe does make quite a bit, so if you are like me and don't need a 9x13 pan, you can always cut the recipe in half and make it in a 9x9.   

I altered this from the original recipe to make it a little bit lighter on calories and fat.  I used 95% lean ground beef and ground turkey rather than the original 2 pounds of hamburger.  I also substitute fat free sour cream and low fat cheese and it tastes just fine.  

Taco Casserole

Ingredients:

2 package Crescent Rolls
1 lb. lean ground beef
1 lb. ground turkey
2 packages taco seasoning 
1 16 oz. bottle of either taco sauce or salsa
16 oz. sour cream
4 cups shredded taco cheese
1 13 oz. bag of Tostitos

Directions:
Preheat the oven to 350 degrees F.


In a large non-stick skillet, brown the ground beef and ground turkey. 
Drain it and add to the seasoning and taco sauce or salsa.  Stir thoroughly.
Simmer for 15 minutes. You want the meat to be coated and relatively dry.


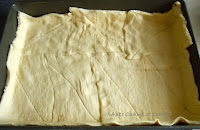
Spray a 9 x 13 pan with non stick cooking spray.  Line the pan with the crescent rolls.  Be sure to press the seams together.
I had two triangles left over, so I popped them in the oven while I was assembling the casserole.
Top with the meat mixture.

Spread on the sour cream.
Top with the cheese.


Crush the Tostitos in the bag and sprinkle on top of the cheese.
Bake in a preheated 350 degree F oven for 30 minutes.


Serve with a tosssed salad and you have a meal and it is hard to not go back for seconds!

Saturday, June 11, 2011

Coconut Banana Pancakes (Gluten and Dairy Free)


I have to admit that when faced with a choice of waffles or pancakes, I'll choose waffles, nearly every time.  So trying new pancake recipes isn't something I'm inclined to do.  However, this recipe caught my eye a while back and since I have some over ripe bananas sitting on the counter, I decided to indulge myself this morning and give this recipe a try.  This is also a great option to regular pancakes if you have dietary considerations that prevent you from eating gluten or dairy products. 

Raw Oats
I have to admit, that when I assembled the ingredients the batter looked too thin.  Then I discovered I had used the 3/4 cup measure instead of the 1 cup measure for the oat flour.  Once that correction was made, the batter was more typical of a pancake batter.

You can purchase oat flour from Bob's Red Mill in most grocery stores.  If your store doesn't carry oat flour, no worries, you can make your own by putting old fashioned oats into your blender and grinding them into flour.  This is quick and easy and is something we can do to help add more whole grain to our diets.
Flour - After Grinding

Coconut Banana Pancakes

Ingredients:

1 cup oat flour
2 Tablespoons baking powder
1/2 teaspoon ground cinnamon
1/4 teaspoon salt
1 very ripe banana, mashed
1 Tablespoon plus 1 teaspoon brown sugar
1 large egg
3/4 cup coconut milk
1 Tablespoon canola oil
Toasted Chopped Pecans
Banana Slices

Directions:

  1. Mix the oat flour with the baking powder, cinnamon and salt in a small bowl and set aside.
  2. In a medium bowl, mix the banana and brown sugar.  Add the oil and egg and coconut milk and mix well.
  3. Fold the flour mixture into the wet ingredients and stir to combine.  Do not overmix.
  4. Heat a cast iron or other heavy skillet over medium heat.  You may want to make a test pancake to test the heat of your skillet.  I found these to burn easily, so be sure to not get your skillet too hot.
  5. Cook pancakes 3- 4 minutes per side, until browned and cooked through. 
  6. Stack them up, top with butter, sliced bananas, chopped pecans and maple syrup.
Pour yourself a hot cup of coffee, grab your fork, dig in and enjoy.


I think this would also be good sprinkled with some toasted coconut, but didn't have any on hand.  I'll try that variation next time I make the recipe.


Thursday, June 9, 2011

Salad Dressing


The local grocery stores provide daily e-mails with recipes and this is one courtesy of Price Chopper.  This dressing is so easy.  You can whip it up in no time and it will be fresh and not have preservatives.  I used my smoothie blender and it worked perfectly, but you can use a full sized blender or a food processor.


Salad Dressing
Ingredients:

2 Tablespoons White Vinegar
2 Tablespoons Sugar
1/2 cup canola oil
1/4 cup red onion, chopped
1 Tablespoon water
1/2 teaspoon dry mustard powder
1/2 teaspoon salt

Directions:

Place all ingredients into the blender or food processor; blend until smooth and pink in color. Store in the refrigerator. Ingredients will separate during storage, just give it a vigorous shake and it will mix up nicely.


I used this dressing on a salad I made with the following ingredients:

Chopped Romaine
Sliced radishes
Sliced red onion
Sweet cherries, pitted and halved
Toasted pecan halves
Freshly grated Parmesan Cheese

Mix together and drizzle with the dressing above and enjoy as a nice side salad, or make a big plateful for lunch or dinner.

Sunday, June 5, 2011

Parmesan-Crusted Chicken Tenders


Chicken is so versatile, you can fix it so many different ways.  I spotted this recipe not to long ago and decided to give it a try and it turned out very well.  The tenders were just that, very tender and they had a nice crispy crust without the mess of frying.

I served it with home prepared honey-mustard dipping sauce, which was nothing more than some Miracle Whip with a little squirt of prepared yellow mustard and a drizzle of honey all mixed up together.    It would also be great with some warm marinara sauce as well, you get to choose....or serve with both!

I served this with the Au Gratin Potatoes (also posted on the blog) and green beans.


Parmesan-Crusted Chicken Tenders

Ingredients:

Canola or olive oil cooking spray
1/4 cup flour
2 large eggs, slightly beaten
1/2 cup finely shredded Parmesan cheese
1 cup coarse dry Italian bread crumbs
1 teaspoon garlic powder
1/4 teaspoon salt
1 pound chicken tenders

Directions:
Preheat oven to 450 degrees F.  Place a large wire rack on a baking sheet and coat with cooking spray.
  1. Place flour in a shallow dish.  Lightly beat the eggs in another shallow dish.  Combine the Parmesan, bread crumbs, garlic powder and salt in a third shallow dish.
  2. Coat each tender in flour, shaking off any excess.
  3. Dip in egg and let any excess drip off.
  4. Roll in the breadcrumb mixture.
  5. Place on the prepared rack.
  6. Generously coat the top of each tender with cooking spray.
  7. Bake for 10 minutes.
  8. Remove from the oven, turn each tender, and coat with cooking spray.
  9. Return to oven and continue baking for 10 additional minutes.
  10. Serve tenders with dipping sauce.

Saturday, June 4, 2011

Au Gratin Potatoes (aka Cheese Potatoes)

I was wandering the isles of the grocery this afternoon trying to decide what to fix to accompany the Parmesan Crusted Chicken Tenders that I'll be serving for dinner tonight and wasn't feeling inspired when I remembered that a friend of mine had asked for my Cheese Potato Recipe.

You would think that would be a relatively easy request to fulfill right?  Not for me.  My problem is that I do not have a written recipe.  I just make it.  You know, add ingredients until it is "just right".  So I could pass along the recipe, I made the effort to write down the ingredients and measurements and the dish is happily bubbling away in the oven and should be ready in about 20 minutes.

This takes more effort to prepare than the boxed variety which is dried potatoes and powdered cheese and you add butter and milk.  I think if you give this recipe a try, you will be happy with the results.

I have some cast enamel cookware that is great for dishes like this.  I used it to saute the bacon and onion and create the sauce, added the potatoes and it went directly into the oven.  So there is one less pan to clean up!  Cast enamel cookware isn't inexpensive, and I only have two pieces, one Le Creuset and one Chantal, and I love to cook with it!

Au Gratin Potatoes

Ingredients:

6 Idaho Potatoes
1 1/2 teaspoons salt
4 slices bacon, diced
1/2 cup sweet onion, diced
2 Tablespoons Olive Oil
1/4 cup all purpose flour
2 cups whole milk
4 oz. Provolone Chees
4 oz. Mild Cheddar
4 oz. Sharp Cheddar
1/4 teaspoon ground black pepper
1/4 teaspoon thyme

Directions:

  1. Peel potatoes and slice them in 1/4 inch slices.
  2. In a large saucepan, cover potatoes with cold water, add salt and bring to a boil.
  3. Boil potatoes about 10 minutes, or until they are almost tender. Drain potatoes and set aside.
  4. Heat a medium size heavy pot over medium high heat.
  5. Add the diced bacon and onion and saute until bacon is crisp.  If your bacon is relatively lean, to prevent burning, add a drizzle of olive oil. 
  6. When the bacon is crisp, remove the bacon and onion with a slotted spoon and set aside.
  7. Add 2 Tablespoons of Olive Oil to the drippings already in the pan.
  8. Stir in 1/4 flour and stir quickly to make a roux.  It will clump like in the photo.
  9. Slowly add 2 cups of cold milk, stirring constantly with a whisk to blend.
  10. When milk starts to thicken add the cheeses, continue to stir constantly until the cheese melts and incorporates with the milk.
  11. Finally, add the black pepper and thyme along with the bacon and onion mixture and stir thoroughly.
  12. Remove from heat.
  13. Spoon  the cooked, drained potatoes into the cheese sauce, mixing carefully to not break up the potatoes.
  14. Turn the mixture into a casserole that you have coated with non-stick spray.
  15. Top with a sprinkling of shredded cheese.
  16. Bake in a preheated 350 degree oven for 30-45 minutes, until bubbly and top is golden brown.