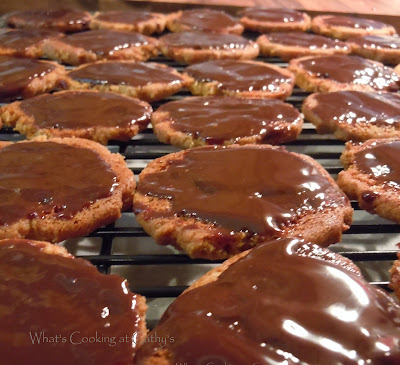
If you are a lover of peanut butter and especially peanut butter cookies, you most certainly will like this recipe. It is simple and you only need a handful of items to make them with an added bonus of being low sugar and gluten free!
I found this recipe via Pinterest which led me to a blog which linked to Food.com. I'm a big Pinterest fan and have pinned oodles of things that I want to try "someday".
Anyway, as most of you know, I've been trying to eat healthier. One of the things I have done is reduce the amount of "white" flour in my diet as well reduced the amount of refined sugar I consume. Since this recipe was gluten free, I figured I would make a few modifications to reduce the sugar and give it a whirl.
The result was a decadent, soft peanut butter cookie with a touch (okay, a slathering) of chocolate on the base....go with me for a minute and think Peanut Butter Milano's. Yeah! Great Results and to top it off, two cookies weigh in at just 115 calories! So I can have two cookies with my coffee and not just one, which is much more satisfying!
If you aren't counting calories and don't mind eating the sugar, you can substitute 1 cup of granulated sugar or split the cup into equal portions of both granulated and brown sugar for a richer colored cookie. Either way you decide to make them, the result will be addicting little cookies... and I'll bet you can't eat just one!
Gluten Free & Sugar Free Peanut Butter Cookies
Yield: 36 cookies
Ingredients:
1/4 cup Whey Low Granular
1/2 cup Whey Low Gold
1 large egg, beaten
1 teaspoon baking soda
Optional Glaze:
1/4 cup heavy cream
1/2 cup chocolate chips
Preheat the oven to 350 degrees F.
Line two cookie sheets with parchment paper or grease the cookie sheets. (I prefer parchment paper for easier cleanup!)
In a medium mixing bowl, beat together the peanut butter and sugar with an electric mixer until smooth and creamy.
Add the beaten egg and soda to the peanut butter mixture and beat until well blended.
Using 1 teaspoon (measuring teaspoon) roll the dough into small balls and place them one inch apart on the cookie sheet.
Flatten the dough balls with the tines of a fork. Dip the tines in the sugar to prevent them from sticking and ruining your lovely crisscross patterns.
Bake the cookies for about 10 minutes, until golden brown.
Cool the cookies on the baking sheet for 5 minutes and then transfer them to a rack to cool.
At this point, you can decide if you want to add the glaze on the bottom of the cookies.
Flip the cookies so their bottoms are up.
In a saucepan, heat the cream until it reaches a boil.
Remove the cream from the heat and pour it over the chocolate chips. Let the mixture sit for 10 minutes then stir and stir and stir. It will look awful initially, but it will come together and create a lovely chocolate glaze.
 Using a pastry brush (yes this is messy), paint the bottom of each cookie with a generous amount of chocolate.
Let these cool and store between sheets of waxed paper. The chocolate will keep the cookies nice and soft. If you are looking for a crisper cookie, omit the chocolate glaze. You can also make sandwich cookies out of these by sticking two cookies together with the chocolate glaze. Either way is yummy!
....and that's What's Cooking at Cathy's ~ Enjoy!


No comments:
Post a Comment