I made a huge purchase of pink grapefruit and I've been searching for ways to use them up! (What was I thinking?!?!?)
I love grapefruit and the bag was a good buy, but honestly, I've shared and shared and I still have plenty! These guys take up so much space in the veggie drawer. In effort to reduce the stash, I've been racking my brain trying to figure out how use them besides eating them for breakfast, juicing them and making sorbet (not that those are bad options).
Ah ha! An idea blooms....after all it is spring and the weather here has been unseasonably warm and what goes with warm weather? Of course, cookouts! A quick trip through the local Price Chopper for some chicken breasts and a jalapeno pepper and oh, a freshly filled backup tank of propane and I was soon back home putting on my apron and firing up the Weber.
I gathered ingredients from the fridge and cabinets, totally flying by the seat of my pants and completely unsure of the end result. I have to say I was pleased with the result and plan on fixing this recipe again soon. Many of the items included in the recipe came from The Olive Tree.
Grapefruit Balsamic Glazed Chicken Breast
Serves 2
Ingredients:
2 skinless boneless chicken breasts
2 teaspoons of Butter Extra Virgin Olive Oil
1 teaspoon of Smoked Bacon Chipotle Salt
2 ruby red or pink grapefruits
1 Tablespoon brown sugar
1 Tablespoon granulated sugar (or more to suite your taste preference)
1 Tablespoon Grapefruit Balsamic Vinegar
1 teaspoon finely minced jalapeno (seeds and membranes removed)
Directions:
Prepare the chicken breasts for grilling by coating them well on both sides with the Butter Olive Oil.
Season the chicken breasts on both sides with the Smoked Bacon Chipotle Salt.
Set the chicken aside while you prepare the glaze.
Halve and section one of the grapefruits, removing all the seeds. Place sections in a medium saucepan.
Squeeze any remaining juice from the grapefruit into the saucepan.
Halve and squeeze the juice from the second grapefruit, removing any seeds, into the saucepan.
Add the brown sugar and granulated sugar to the grapefruit. Taste and adjust sugar if necessary.
Add the jalapeno pepper and bring the mixture to a rolling boil. Stir occasionally to prevent any sticking.
Boil the mixture until it reduces by half.
When the mixture is reduced, stir in the Grapefruit Balsamic Vinegar and mix thoroughly.
Boil another 5 minutes and remove from heat.
Grill the chicken breasts. After the initial chicken flip, baste the cooked side of the chicken breast with the grapefruit balsamic reduction. When chicken has cooked completely, flip again and brush he unglazed side of the chicken with the sauce.
(I know, I know.... you aren't supposed to flip meat more than once while grilling, but I did flip these a couple more times to get a nice glaze on them.
Remove from the grill and serve.
To accompany the chicken, I grilled asparagus spears seasoned with sea salt, cracked black peppercorns and a little drizzle of the Butter Olive Oil. I put them on the grill when the chicken was nearly done. Give the pan a shake a time or two during the cooking so the spears cook evenly.
Once plated, I topped it with a grating of fresh Parmesan cheese and a few pignoli (pine nuts).
...and that's What's Cooking at Cathy's ~ Enjoy!
Sunday, March 25, 2012
Saturday, March 17, 2012
Irish Soda Bread
Today is St. Patrick's Day and parades and celebrations are plentiful and everything is green!
I'm not so much into the celebration and party atmosphere that the holiday brings....rather, I'm here in my kitchen, having my own kind of fun with flour, butter, milk and a few other ingredients. The holiday has inspired me to try something new, something I've not made before....Irish Soda Bread. It is surprisingly simple and uber easy if you have a Kitchen Aid stand mixer to lend a hand.
I haven't planned a "traditional" Irish meal. You see, I'm not a big fan of corned beef and cabbage and boiled potatoes. It's not the veggies I have issues with, I'm just not a big fan of corned beef. Instead I am slow cooking a brisket with my homemade dry rib rub and grilling some cabbage slices and will accompany those with this recipe for Irish Soda Bread (slathered with butter).
I found this recipe on allrecipes.com. The recipe has a high rating and a sea of positive comments. Based on the comments of the masses, I altered the baking instructions just slightly. I lowered the oven temperature and increased the baking time. I also opted to bake my bread as 2 loaves rather than one large loaf and I'm baking it in baking pans that are stoneware (think pizza stone) in hopes of a nice crusty bottom on the loaves.
Don't worry about the 1/4 cup melted butter and 1/4 cup buttermilk that you baste the bread with. It sounds like a lot, but I used every drop. The bread is out of the oven now and it smells heavenly and it surelooks is tasty!
Irish Soda Bread
adapted from allrecipes.com
Ingredients:
4 cups all-purpose flour
4 Tablespoons white sugar
1 teaspoon baking soda
1 Tablespoon baking powder
1/2 teaspoon salt
1/2 cup butter, softened
1 cup buttermilk
1 egg
1/4 butter, melted
1/4 cup buttermilk
Directions:
Preheat the oven to 350 degrees F.
If you are using a pizza stone or stoneware baking dishes, preheat the baking dishes along with the oven.
In a large mixing bowl, mix together the four, sugar, baking soda, baking powder, salt and 1/2 cup butter. It should look like this when it is "right".
Stir in the egg and buttermilk.
Turn the dough out onto a floured board and knead a few turns to pull it together. Don't work it too much. This is a different type of dough than regular bread dough and it won't benefit from excessive kneading.
Form the dough into two 6 inch rounds and place them in the baking dishes (or on a cookie sheet, etc.).
Pat the dough down slightly and using a sharp knife make a "X" in the top of the loaves.
(I think I cut mine too deep, I'll go a little easier next time I make the bread.)
In a small bowl, combine the melted butter and buttermilk.
Brush the tops of the loaves with this mixture and put them into the preheated oven.
Bake 50-60 minutes, checking for doneness. When done a toothpick inserted into the center of the loaf will come out clean. Brush the loaf with the butter mixture while it continues to bake. I did 4 brushings every 10-15 minutes.
When the loaves come out of the oven, wrap them in a clean dish towel and set the loaves on racks to cool. Yes, it is okay to slice off a chunk! Everyone knows the best bread is warm from the oven!
I am really satisfied with this recipe. I think it also has great possibilities for added ingredients such as rosemary, raisins, apricots, etc.
Tie on your apron, and bake up a couple of loaves and share one with a friend!
I'll close today's post with an Irish Blessing.
May joy and peace surround you,
Contentment latch your door,
And happiness be with you now,
And bless you evermore."
...and that's What's Cooking at Cathy's ~ Enjoy!
I'm not so much into the celebration and party atmosphere that the holiday brings....rather, I'm here in my kitchen, having my own kind of fun with flour, butter, milk and a few other ingredients. The holiday has inspired me to try something new, something I've not made before....Irish Soda Bread. It is surprisingly simple and uber easy if you have a Kitchen Aid stand mixer to lend a hand.
I haven't planned a "traditional" Irish meal. You see, I'm not a big fan of corned beef and cabbage and boiled potatoes. It's not the veggies I have issues with, I'm just not a big fan of corned beef. Instead I am slow cooking a brisket with my homemade dry rib rub and grilling some cabbage slices and will accompany those with this recipe for Irish Soda Bread (slathered with butter).
I found this recipe on allrecipes.com. The recipe has a high rating and a sea of positive comments. Based on the comments of the masses, I altered the baking instructions just slightly. I lowered the oven temperature and increased the baking time. I also opted to bake my bread as 2 loaves rather than one large loaf and I'm baking it in baking pans that are stoneware (think pizza stone) in hopes of a nice crusty bottom on the loaves.
Don't worry about the 1/4 cup melted butter and 1/4 cup buttermilk that you baste the bread with. It sounds like a lot, but I used every drop. The bread is out of the oven now and it smells heavenly and it sure
Irish Soda Bread
adapted from allrecipes.com
Ingredients:
4 cups all-purpose flour
4 Tablespoons white sugar
1 teaspoon baking soda
1 Tablespoon baking powder
1/2 teaspoon salt
1/2 cup butter, softened
1 cup buttermilk
1 egg
1/4 butter, melted
1/4 cup buttermilk
Directions:
Preheat the oven to 350 degrees F.
If you are using a pizza stone or stoneware baking dishes, preheat the baking dishes along with the oven.
In a large mixing bowl, mix together the four, sugar, baking soda, baking powder, salt and 1/2 cup butter. It should look like this when it is "right".
Turn the dough out onto a floured board and knead a few turns to pull it together. Don't work it too much. This is a different type of dough than regular bread dough and it won't benefit from excessive kneading.
Form the dough into two 6 inch rounds and place them in the baking dishes (or on a cookie sheet, etc.).
Pat the dough down slightly and using a sharp knife make a "X" in the top of the loaves.
(I think I cut mine too deep, I'll go a little easier next time I make the bread.)
In a small bowl, combine the melted butter and buttermilk.
Brush the tops of the loaves with this mixture and put them into the preheated oven.
Bake 50-60 minutes, checking for doneness. When done a toothpick inserted into the center of the loaf will come out clean. Brush the loaf with the butter mixture while it continues to bake. I did 4 brushings every 10-15 minutes.
When the loaves come out of the oven, wrap them in a clean dish towel and set the loaves on racks to cool. Yes, it is okay to slice off a chunk! Everyone knows the best bread is warm from the oven!
I am really satisfied with this recipe. I think it also has great possibilities for added ingredients such as rosemary, raisins, apricots, etc.
Tie on your apron, and bake up a couple of loaves and share one with a friend!
I'll close today's post with an Irish Blessing.
May joy and peace surround you,
Contentment latch your door,
And happiness be with you now,
And bless you evermore."
Saturday, March 10, 2012
Gluten Free and Sugar Free Peanut Butter Cookies
If you are a lover of peanut butter and especially peanut butter cookies, you most certainly will like this recipe. It is simple and you only need a handful of items to make them with an added bonus of being low sugar and gluten free!
I found this recipe via Pinterest which led me to a blog which linked to Food.com. I'm a big Pinterest fan and have pinned oodles of things that I want to try "someday".
Anyway, as most of you know, I've been trying to eat healthier. One of the things I have done is reduce the amount of "white" flour in my diet as well reduced the amount of refined sugar I consume. Since this recipe was gluten free, I figured I would make a few modifications to reduce the sugar and give it a whirl.
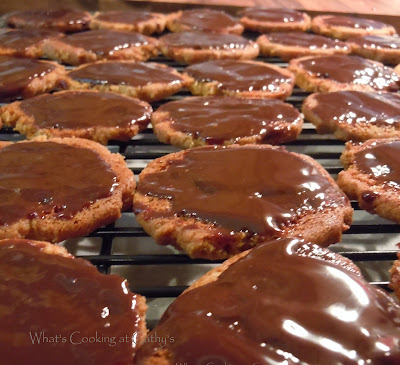
The result was a decadent, soft peanut butter cookie with a touch (okay, a slathering) of chocolate on the base....go with me for a minute and think Peanut Butter Milano's. Yeah! Great Results and to top it off, two cookies weigh in at just 115 calories! So I can have two cookies with my coffee and not just one, which is much more satisfying!
If you aren't counting calories and don't mind eating the sugar, you can substitute 1 cup of granulated sugar or split the cup into equal portions of both granulated and brown sugar for a richer colored cookie. Either way you decide to make them, the result will be addicting little cookies... and I'll bet you can't eat just one!
Gluten Free & Sugar Free Peanut Butter Cookies
Yield: 36 cookies
Ingredients:
1/4 cup Whey Low Granular
1/2 cup Whey Low Gold
1 large egg, beaten
1 teaspoon baking soda
Optional Glaze:
1/4 cup heavy cream
1/2 cup chocolate chips
Preheat the oven to 350 degrees F.
Line two cookie sheets with parchment paper or grease the cookie sheets. (I prefer parchment paper for easier cleanup!)
In a medium mixing bowl, beat together the peanut butter and sugar with an electric mixer until smooth and creamy.
Add the beaten egg and soda to the peanut butter mixture and beat until well blended.
Using 1 teaspoon (measuring teaspoon) roll the dough into small balls and place them one inch apart on the cookie sheet.
Flatten the dough balls with the tines of a fork. Dip the tines in the sugar to prevent them from sticking and ruining your lovely crisscross patterns.
Bake the cookies for about 10 minutes, until golden brown.
Cool the cookies on the baking sheet for 5 minutes and then transfer them to a rack to cool.
At this point, you can decide if you want to add the glaze on the bottom of the cookies.
Flip the cookies so their bottoms are up.
In a saucepan, heat the cream until it reaches a boil.
Remove the cream from the heat and pour it over the chocolate chips. Let the mixture sit for 10 minutes then stir and stir and stir. It will look awful initially, but it will come together and create a lovely chocolate glaze.
Using a pastry brush (yes this is messy), paint the bottom of each cookie with a generous amount of chocolate.
Let these cool and store between sheets of waxed paper. The chocolate will keep the cookies nice and soft. If you are looking for a crisper cookie, omit the chocolate glaze. You can also make sandwich cookies out of these by sticking two cookies together with the chocolate glaze. Either way is yummy!
....and that's What's Cooking at Cathy's ~ Enjoy!
Monday, March 5, 2012
Chocolate Pie with Coconut Crust
Do you like Mounds candy bars? If so, you will love this Martha Stewart recipe. It is so decadent and simple to make with only 4 ingredients. Well in my case 5 (I just can't help myself, I have to tinker with the recipe)!
You just might possibly have all the ingredients in your pantry right now! So what are you waiting for? Tie on your apron and let's get busy!
Chocolate Pie with Coconut Crust
Crust:
4 tablespoons unsalted butter, softened
1 14 oz. bag of sweetened shredded coconut
Filling:
1 1/4 cups heavy cream
8 ounces bittersweet chocolate (preferably 61% cacao), finely chopped
Directions:
Preheat the oven to 350 degrees F.
Pour the bag of coconut into a mixing bowl.
Mix in the softened butter with your fingers. My butter was cold from the fridge, so I microwaved it for about 30 seconds to soften it. Continue to mix until the butter is evenly distributed throughout the coconut. It should still be fluffy.
Next place your 9-inch pie plate on a baking sheet (you will need to catch stray coconut).
Place the coconut-butter mixture into the pie pan. Press the mixture into the bottom and up the sides to form the crust. Be sure to leave the top edges loose and fluffy. Place a foil ring over the edges to prevent burning.
Bake until the center begins to brown. This should take 10 to 15 minutes. Keep a close eye on it because you don't want it to burn. Remove the foil and continue to bake until the edges are browned, 4 to 6 minutes. Depending on your oven, you may need to rotate the cookie sheet so the crust edges brown evenly.
When nicely browned, remove from the oven to a wire rack and cool completely.
While the crust is cooling, finely chop the chocolate and place in medium sized heat proof bowl.
Bring the cream just to a boil in a small saucepan; pour over the chocolate. You may have noticed that I used more cream. I did that because I had just wee bit more chocolate than 8 oz. so I was keeping a balance in my measurements.
Let the mixture sit 10 minutes, then stir until the chocolate is completely melted and the mixture is thoroughly combined. Initially you will think that it is a mess, but keep stirring, it will turn smooth and silky in mere minutes.
Sometimes you feel like a nut.....and today I added toasted sliced almonds to the top of the pie before I put it in the fridge.
Oh, and do make sure you have room in the fridge for the pie in advance.
Fortunately my refrigerator has a hideaway shelf that accommodates my pie plate perfectly!
Now the hard part.....waiting for it to chill so I can have a slice!
This is not a lightweight dessert. A small slice (1/10th of the pie) is 398 calories!
You just might possibly have all the ingredients in your pantry right now! So what are you waiting for? Tie on your apron and let's get busy!
Chocolate Pie with Coconut Crust
Crust:
4 tablespoons unsalted butter, softened
1 14 oz. bag of sweetened shredded coconut
Filling:
1 1/4 cups heavy cream
8 ounces bittersweet chocolate (preferably 61% cacao), finely chopped
Directions:
Preheat the oven to 350 degrees F.
Pour the bag of coconut into a mixing bowl.
Next place your 9-inch pie plate on a baking sheet (you will need to catch stray coconut).
Bake until the center begins to brown. This should take 10 to 15 minutes. Keep a close eye on it because you don't want it to burn. Remove the foil and continue to bake until the edges are browned, 4 to 6 minutes. Depending on your oven, you may need to rotate the cookie sheet so the crust edges brown evenly.
When nicely browned, remove from the oven to a wire rack and cool completely.
While the crust is cooling, finely chop the chocolate and place in medium sized heat proof bowl.
Bring the cream just to a boil in a small saucepan; pour over the chocolate. You may have noticed that I used more cream. I did that because I had just wee bit more chocolate than 8 oz. so I was keeping a balance in my measurements.
Let the mixture sit 10 minutes, then stir until the chocolate is completely melted and the mixture is thoroughly combined. Initially you will think that it is a mess, but keep stirring, it will turn smooth and silky in mere minutes.
Pour the mixture into the cooled coconut crust.
Refrigerate until the filling is set.
Fortunately my refrigerator has a hideaway shelf that accommodates my pie plate perfectly!
Now the hard part.....waiting for it to chill so I can have a slice!
This is not a lightweight dessert. A small slice (1/10th of the pie) is 398 calories!
...and that's What's Cooking at Cathy's ~ Enjoy!
Friday, March 2, 2012
Egg Salad
I often enjoy egg salad for lunch at a deli near my office. Nearly every time I have egg salad at the deli, I ask myself why don't I make this at home. It is not difficult and I nearly always I have everything I need on hand. I just never seem to think about it.
Today I was in search of something quick and easy for lunch and decided that egg salad sounded good so I gathered the ingredients and mixed up enough for a sandwich today and had enough left for more later this week.
First I had to cook the eggs. Hard boiling eggs is really easy. Put the eggs into a pan large enough to hold them, but not so large that they bounce around. Next cover them with cold water and heat them until the water boils. Remove the pan from the burner and let it sit for 15 minutes. Drain and rinse the eggs with cold water to stop the cooking. Peel the eggs and you are ready to make salad.
Removing the pan of eggs from the heat source keeps them from cracking and seeping out of the shells and also prevents the dreadful green ring around the yolk and the whites are tender and not rubbery.
Egg Salad
This will make enough for 3 or 4 sandwiches depending on how much you pile on.
Ingredients:
4 Hard boiled eggs, coarsely chopped
1/3 cup chopped sweet pickle
1 tablespoon minced onion
1 teaspoon Mrs. Dash
3 tablespoons Miracle Whip or Mayo
1 teaspoon Dijon Mustard
1/2 teaspoon lemon juice
Directions:
I fixed my sandwich with a toasted bun, lettuce, dill pickles and some shredded carrots and a side of fresh apricots.
Today I was in search of something quick and easy for lunch and decided that egg salad sounded good so I gathered the ingredients and mixed up enough for a sandwich today and had enough left for more later this week.
First I had to cook the eggs. Hard boiling eggs is really easy. Put the eggs into a pan large enough to hold them, but not so large that they bounce around. Next cover them with cold water and heat them until the water boils. Remove the pan from the burner and let it sit for 15 minutes. Drain and rinse the eggs with cold water to stop the cooking. Peel the eggs and you are ready to make salad.
Removing the pan of eggs from the heat source keeps them from cracking and seeping out of the shells and also prevents the dreadful green ring around the yolk and the whites are tender and not rubbery.
Egg Salad
This will make enough for 3 or 4 sandwiches depending on how much you pile on.
Ingredients:
4 Hard boiled eggs, coarsely chopped
1/3 cup chopped sweet pickle
1 tablespoon minced onion
1 teaspoon Mrs. Dash
3 tablespoons Miracle Whip or Mayo
1 teaspoon Dijon Mustard
1/2 teaspoon lemon juice
Directions:
- Peel and chop the hard boiled eggs.
- Chop sweet pickles and mince the onion.
- Mix all ingredients together in a mixing bowl.
- Chill and Serve.
I fixed my sandwich with a toasted bun, lettuce, dill pickles and some shredded carrots and a side of fresh apricots.
...and that's What's Cooking at Cathy's ~ Enjoy!
Thursday, March 1, 2012
Breakfast Bake
I made a frittata last week and it was so good, I decided to make a similar version to pack for my breakfasts this week. It is a good breakfast dish or can be used for lunch or dinner, just add a tossed salad as a side.
Substitute fresh vegetables to your liking. I used what I had on hand. Onions and bell peppers and carrots are staples in my veggie drawer in the fridge so mixing this up is super quick and easy.
You can also change up the meat(s) in this recipe to fit your family's tastes as well.
I made sausage earlier this spring and have it in handy 1 pound packages in the freezer. I also had some bacon remaining from another recipe so I chopped it up, cooked it until crispy and added it to the mixture.
If you are not a meat eater, you can leave out the meat, add some chopped, sauted portabella mushrooms instead or just use more fresh veggies. You can truly "have it your way".
Breakfast Bake
Yield: 8 Servings
Ingredients:
1 pound sausage (breakfast, italian, turkey - you decide)
8 oz. bacon, diced and cooked
1/2 green bell pepper, diced
1/2 red bell pepper, diced
1/2 orange bell pepper, diced
1/2 medium red onion, diced
1/2 sweet vidalia onion, diced
1 cup shredded carrots
12 eggs, beaten, or equivalent egg substitute (I used the substitute)
1 cup shredded cheddar cheese (again, use what you like or have on hand)
1 teaspoon freshly ground black pepper
Directions:
I made sausage earlier this spring and have it in handy 1 pound packages in the freezer. I also had some bacon remaining from another recipe so I chopped it up, cooked it until crispy and added it to the mixture.
If you are not a meat eater, you can leave out the meat, add some chopped, sauted portabella mushrooms instead or just use more fresh veggies. You can truly "have it your way".
Yield: 8 Servings
1 pound sausage (breakfast, italian, turkey - you decide)
8 oz. bacon, diced and cooked
1/2 green bell pepper, diced
1/2 red bell pepper, diced
1/2 orange bell pepper, diced
1/2 medium red onion, diced
1/2 sweet vidalia onion, diced
1 cup shredded carrots
12 eggs, beaten, or equivalent egg substitute (I used the substitute)
1 cup shredded cheddar cheese (again, use what you like or have on hand)
1 teaspoon freshly ground black pepper
- Preheat oven to 350 degrees F.
- Spray a casserole dish with non stick spray. This fit nicely in my "hand me down" pyrex dish that had been my mom's. It measures 7 1/2 x 12 inches.
- Preheat 12" skillet over medium heat, add the sausage, cook until brown and crumbly. Remove sausage with slotted spoon and drain on paper towels.
- Add the chopped bacon to the pan and cook until crispy. Remove the bacon pieces with a slotted spoon and drain on paper toweling.
- Chop the bell peppers and onions and shred the carrots (hint - buy the carrots already shredded, it is easier and saves your knuckles).
- Place the meat in the greased casserole.
- Layer on the vegetables.
- Beat and pour the eggs over the top. Sprinkle with black pepper.
- Sprinkle with the cheddar cheese.
- Give everything a quick stir to evenly distribute the ingredients.
- Bake at 350 degrees F for 45-60 minutes until set in the center.
Vanilla Spiced Peach Jam
White peaches, they are so delicate and lovely.
My local farmer's market had the most beautiful white peaches recently and this recipe is wonderful for slathering on homemade biscuits, toast even used as an ice cream topping. For later, you could gently warm some of the jam and use it to top waffles or pancakes (and top with a scoop of vanilla ice cream to make a decadent breakfast).
This is a simple recipe so if you haven't done food preservation in the past, and you'd like to give it a try, this recipe is perfect. It doesn't make a large quantify to take a huge effort.
Give it a try and have some nice jam to help you think of spring and summer during those long cold winter months.
Vanilla Spiced White Peach Jam
Ingredients:
1 whole Vanilla Bean, split
6 Tablespoons lemon juice, fresh
2 teaspoons ground cinnamon
1 teaspoon ground cardamom
1 teaspoon ground nutmeg
1/8 teaspoon ground cloves (if you don't like clove, you can omit)
2 1/4 cups granulated sugar (or more as needed)
5 pounds of white peaches, peeled and chopped
Directions:
Place all ingredients in a large heavy bottomed pot; stir to combine.
Bring to a rolling boil over medium-high heat. Boil about 15 minutes, stirring occasionally.
Carefully taste the mixture to determine if it needs additional sugar (I didn't add anything additional). If so, increase the sugar to taste.
While the mixture boils, mash the fruit with a potato masher to desired consistency.
Continue to boil another 10 minutes, stirring frequently.
The mixture will thicken slightly.
Remove from the heat and discard the vanilla bean.
Pour the hot jam into 8 sterilized 8 ounce or 4 16 ounce jars.
Carefully wipe jar rims and cover.
Immediately process in a boiling water bath for 5 minutes.
Have a Peach of a Day!
....that is What's Cooking at Cathy's ~ Enjoy!
Subscribe to:
Posts (Atom)