Showing posts with label Main Dish. Show all posts

Friday, July 31, 2015

Chicken and Dumplin's

Seems my blogging lately has been related to our food days at work.  This month's theme is our mother's best recipe. Unfortunately, the two recipes that I think are mom's best aren't suitable for the bus trip into the office.

I did my recipe prep over a couple of evenings.  First I cooked the chicken, cooled it and refrigerated the broth overnight.  I got a big ol' slab of fat from the top resulting from the night in the fridge.  I picked the chicken and then put everything together the night before taking it to work.

Of course, I had to do a sampling to make sure it as fit to take to work <grin>.  As luck would have it,  my eating a bowl reduced the quantity just enough for the remaining chicken and dumplings to fit into the Tupperware bowl for transporting.   I was thrilled to have kept myself from having seconds! 

I can't wait for our potluck tomorrow and having another serving of this comforting dish!


Saturday, April 26, 2014

Ham Loaf


I've been hamming it up!  Today was all about cooking with ham!

I also made Ham Salad, which will be in a future post, as a result of my "free" Thanksgiving 6 pound, fully cooked ham, that I've had stashed away in the freezer.

I doubled the recipe with the intent of having one for quick suppers during the upcoming week and the second to seal with my Foodsaver and freeze for a later time when I'm not in the mood or just too busy to cook. Believe it or not, that does happen!

I can only recall having Ham Loaf a few times growing up.  I guess because ham leftovers were few and far between at our house.  When we were lucky enough to have one, the entire family devoured it.
We devoured at our house growing up.  Mealtime was focused on eating and not leisurely dining with conversation as there was often work yet to be done before dark.  While this may be foreign to many folks, it is the way I grew up.

I've altered the recipe for the Ham Loaf to fit my low carb way of eating, but I've included the original ingredients beside each item for those of you who want to make the original version.

I just pulled this out of the oven and had to snitch a sample to see how it tasted (quality control you know).  It is yummy! I ate 1/2 the slice while taking the photos!


Sunday, October 28, 2012

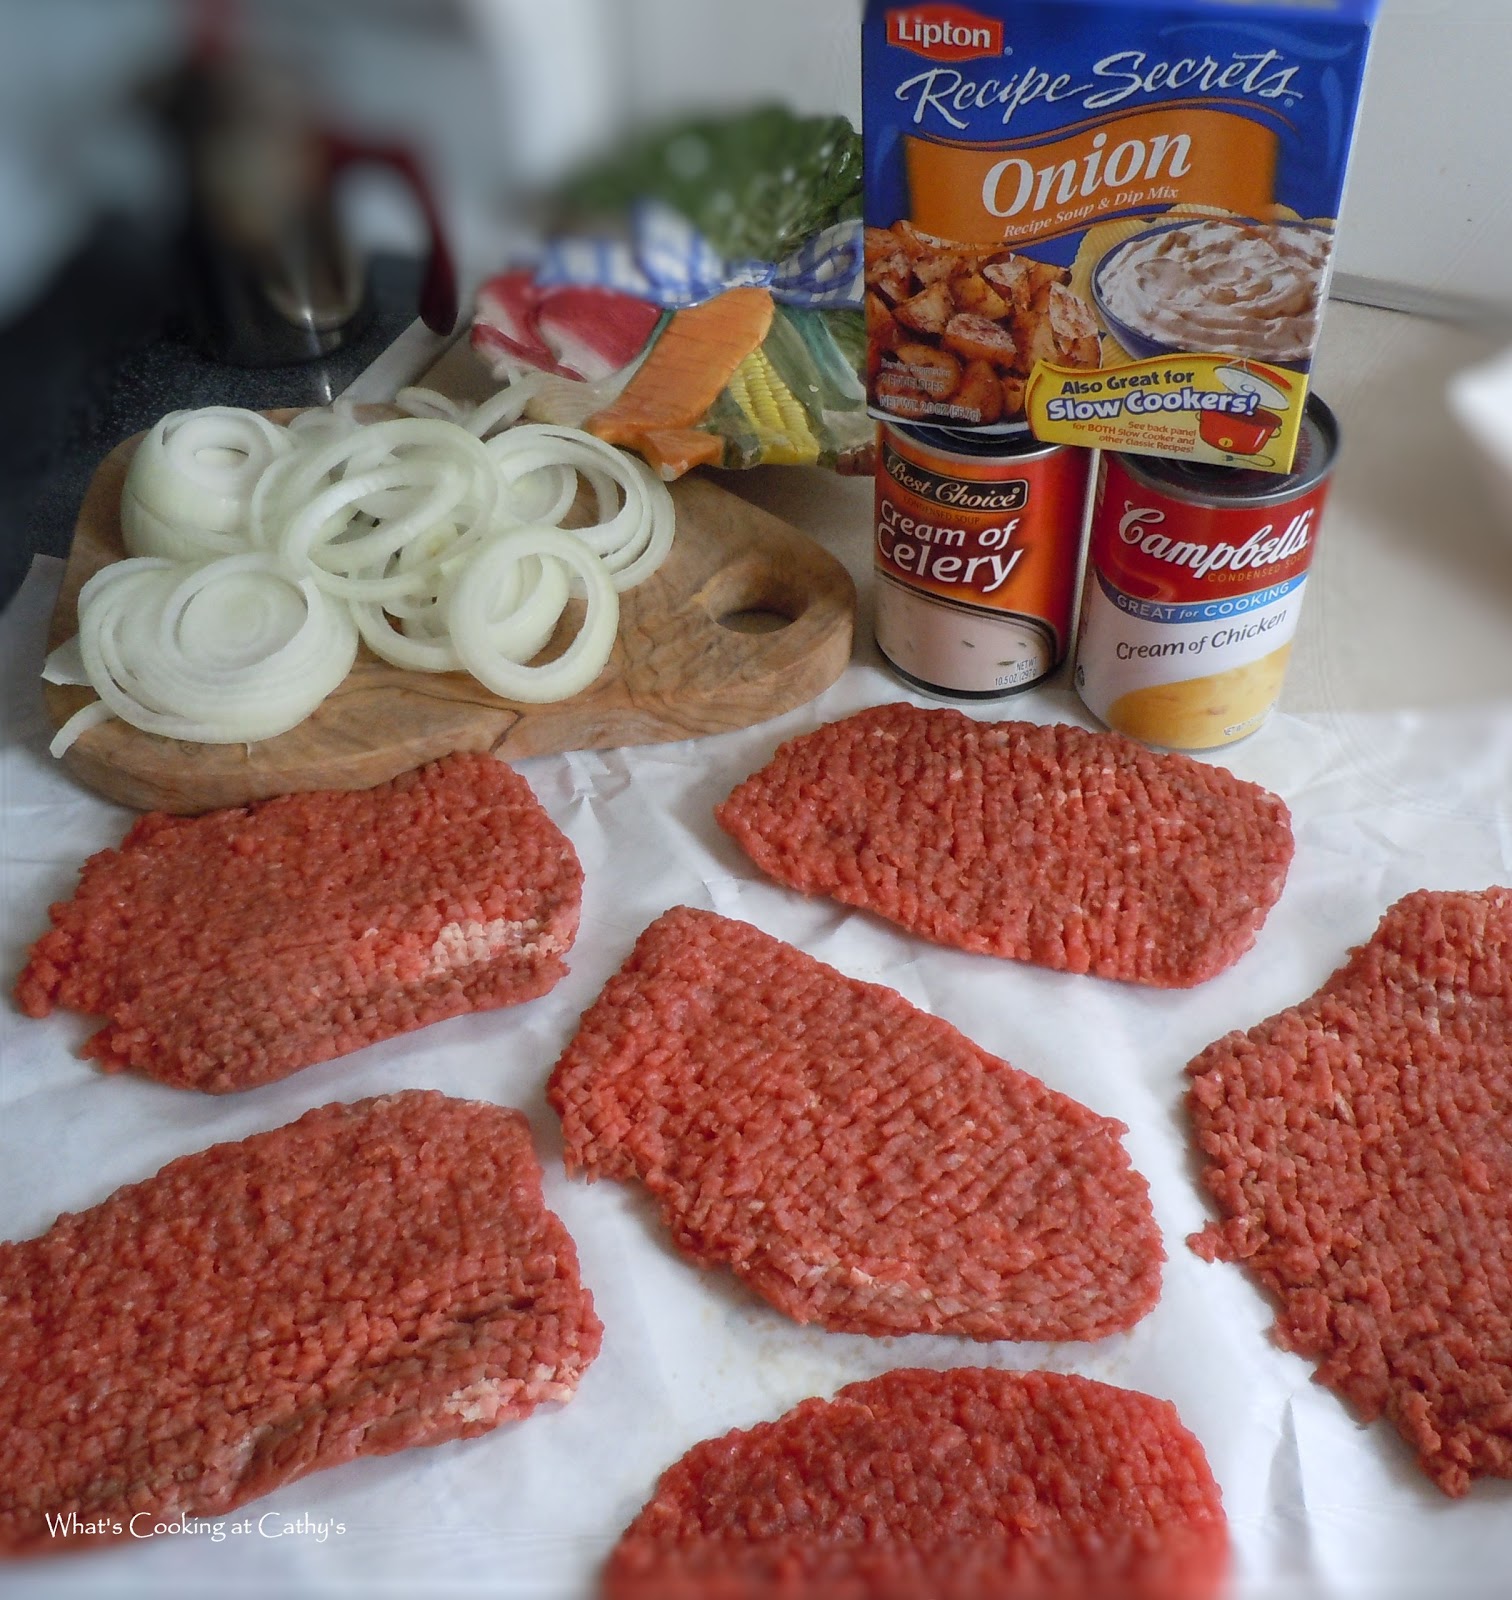
Crock-pot Cube Steak

This past week we had 80 degree temperatures followed up with a hard freeze!  When I went to work one day it was summer and when I left work it was winter.  I think I have whiplash!

With the return of cool (okay cold) weather, my thoughts of food head straight to warming comfort foods, you know things that warm you from the inside out.

Lately, my kitchen time has been limited due to a cabinet refinishing project (you've might have noticed I've missed a few weeks..sorry, I am feeling guilty), I needed to get a little more creative with meal preparation.   To help me, I turned to my crock-pot.  This is one helpful appliance and I should rely on mine more than I do.

This weekend, I purchased cube steaks at the grocery to make this quick and easy recipe (never mind that I had to explain to the fellow behind the meat counter that cube steak was not hamburger steak).

The end result doesn't look stellar on the plate, but you'll quickly forget about the lack of beauty attributes and photogenic qualities once you dig into a gravy slathered bite.  Of course you have to have mashed potatoes to accompany it to take advantage of the wonderful gravy!  Seconds please!

Monday, January 16, 2012

Cajun Baked Tilapia

I have had a tendency to shy away from posting the super simple recipes on the blog because for the most part there isn't a written recipe that I use.  I just put the things together.

After bemoaning to a friend over the weekend that I haven't made anything exciting because of my quest for healthier eating and losing a few (ok more than a few) pounds she reminded me that not everyone had the inspiration to just throw simple things together or that not everyone knew how to cook.

So while I'm dieting and improving my eating habits, I'll be sharing simple  and quick recipes that are part of my current quest for healthier eating and I hope you give them a try and enjoy!

Today I'm fixing baked fish.  I find that Tilapia is one of my favorites.  It is mild and not overtly "fishy" which lets the seasonings shine and cooks up in a flash.  I typically purchase Tilapia filets frozen so I have it on hand but I have also purchased fresh filets from the supermarket.

Cajun Baked Tilapia
Servings:  2

Ingredients:

2 4 ounce Tilapia filets
1 teaspoon Cajun Spice
Non Stick Spray

Directions:

Preheat the oven to 400 degrees F.
Line a cookie sheet with foil and coat lightly with non-stick spray. This will make clean up a breeze.
Place the filets 2 inches apart on the cookie sheet.
Sprinkle the top of each filet with 1/2 teaspoon of seasoning (or add more if you prefer to kick up the spice).
Place sheet in the oven and bake for 20 minutes or until fish flakes easily.


.....and that's What's Cooking at Cathy's ~ Enjoy!

Saturday, October 1, 2011

Creamy Chicken Basil Alfredo

I had a package of chicken tenders to fix for dinner this week and couldn't decide what to do with them.  Staring me in the face on my kitchen counter was my basil plant in desperate need of pruning.  A quick check of the pantry and fridge and I had my answer....


Creamy Chicken Basil Alfredo
Yield:  4 Servings

Ingredients:

1 one pound package raw chicken strips
1 Tablespoon Mrs. Dash seasoning
2 teaspoons extra virgin olive oil
8 ounces fettuccine pasta
1/4 cup butter
1 cup fat free Half and Half
1 clove garlic, crushed
2 cups freshly grated Parmesan cheese
1/2 cup fresh chopped basil

Directions:
Cut each chicken strip into thirds.
In a heavy skillet, heat olive oil over medium heat.
Add chicken pieces and seasoning and cook until done and well browned.
Remove the chicken from the pan and set aside.
In a medium pot, heat water to boiling and cook fettuccine until al dente.
Wash and chop the fresh basil.

When pasta is nearly cooked, add the butter to the heavy skillet (don't worry about cleaning it from the browned chicken) and melt over low heat.
Add the Half and Half and simmer for 5 minutes.
Add the garlic and cheese and whisk quickly.
Mixture will rapidly thicken.  Stir until the cheese melts and the mixture is smooth and creamy. (This will happen quickly).
Add the chicken and the fresh chopped basil into the sauce.
Using tongs, add the drained fettuccine to the skillet and gently lift and turn the mixture to evenly coat the chicken and pasta.
Place individual servings into pasta bowls and top with a fresh grind of black pepper and a sprig of fresh basil.

....and that my friends is What's Cooking a Cathy's ~ Enjoy!

Friday, August 5, 2011

Good Stuff


I know, I know...you are probably saying to yourself what kind of name is that for a recipe.  Well, you are probably right.  We had this frequently when I was growing up, probably because it was inexpensive, simple ingredients, easy to fix and good.  I think the official name is Hamburger Casserole, but we called it "Good Stuff" and I think that is more appropriate because that is exactly what it is....Good Stuff and it is one of my "comfort foods".  I hope you give it a try and enjoy it!


Good Stuff (Hamburger Casserole)
Serves 4

Ingredients:

1 lb. lean ground beef
1 medium onion, chopped
2 cans of green beans, drained
1 can of cream of tomato soup
1/2 soup can of water
salt and pepper to taste

Directions:

Brown ground beef along with chopped onion in a large skillet over medium high heat.
Drain any excess fat
Add drained green beans, tomato soup, water, salt and pepper.
Stir, mixing well.
Simmer covered for 15 minutes.


We always had biscuits with this recipe, so you might want to bake a pan while the Good Stuff is simmering on the stove.

That's What's Cooking at Cathy's!  Enjoy!

Tuesday, July 12, 2011

Stuffed Peppers


Stuffed peppers is not something we ever had when I was growing up, or at least not that I can remember, but they are something that I really like and they are easy to make, taste good and are good for you!

I was having a craving for stuffed peppers and like many of the things I make, my stuffed peppers are something I just throw together and as a result they never taste quite the same way twice.  Today's recipe was no different, but now that I'm blogging to share recipes that I make, adapt or create, I keep a notepad and pen alongside the camera in the kitchen so I can easily jot down the ingredients and measurements I go.

Maybe this time I was so hungry for  stuffed peppers that the filling tasted extra good, or maybe I just hit upon a combo that is extra special.  I have to admit that I had enough filling to fill another pepper, so what to do with the leftover filling?  Hum..I must confess that I got myself a spoon and shamelessly ate the rest of the filling while standing over the kitchen sink. 

I cooked the filling and baked these peppers in my new Le Creuset 3 1/2 quart Buffet Pan.  If you have something similar, this recipe makes and bakes in one pan and clean up is a whiz!

Some recipes you find will instructions to preboil the peppers.  Personally, I like my veggies to be a bit more crispy and less wimpy, so I prefer to just let mine cook in the oven. If you prefer yours precooked, you can certainly do that in addition to steps listed below.  If you do precook the peppers, lower the oven temperature to 325 degrees F and reduce baking time to approximately 30 minutes.

I did not specify the color of the peppers.  I will leave that choice up to you. I personally prefer the red, yellow or orange to the green, but any color will do. You will see from the photos that I used mostly red but did have a green one thrown in for variation. 

Give this recipe a try.  I hope you like it as much as I do!

Stuffed Peppers

Ingredients:

5 Bell Peppers, any color
1 Tablespoon Garlic Infused Extra Virgin Olive Oil
1 medium Onion, chopped
1.25 lbs. lean ground Turkey
1/2 teaspoon Salt
1 teaspoon Cumin
1 teaspoon medium Chili Powder
1 cup shredded Carrot
1 box of frozen shoe peg corn (or 2 ears of fresh cut corn)
1/4 cup Taco Sauce (your favorite)
1/2 cup shredded sharp cheddar cheese


Directions:
  1. Preheat oven to 350 degrees F.
  2. Wash and cut bell peppers in half, top to bottom so you have 2 halves to fill later.
  3. Remove the seeds and membranes and rinse to remove all the seeds.
  4. Heat a heavy oven proof skillet over medium heat.  Drizzle in the garlic infused extra virgin olive oil.
  5. Add the onions, ground turkey, salt, cumin and chili powder and stir, cooking until turkey is done. Continue to cook until all liquid (water) has evaporated.
  6. Chop one of the 5 bell peppers and add it to the turkey along with the carrots, corn and taco sauce.
  7. Mix over medium heat just to warm everything through.
  8. Remove stuffing mixture to another bowl.
  9. Spoon stuffing into each bell pepper half and arrange them in the heavy ovenproof skillet or a separate casserole dish, repeating until all of the peppers are full.
  10. Put an extra teaspoon of taco sauce on the top of each pepper (my sauce has a squirt top, so I just squirt some on).
  11. Top with shredded cheese.
  12. Bake uncovered in the preheated oven for 45 minutes.

Enjoy!

Friday, July 1, 2011

Crusty Fish Fillets

I learned about this recipe a couple of years ago and it has been one of my go-to recipes when I have fresh fish to prepare since that time.

Most recently, I had Tilapia and it works great.

Wheat Germ is readily available in the supermarket.  I had to buy some the first time I made this because it wasn't something I had stocked in my pantry.  I would recommend that when you toast it in the oven, watch it very closely so it doesn't burn.  I've had to toss burned wheat germ and start over on occasion when I was busy and wasn't paying close attention.  Another tip is once you open the wheat germ, keep it in the refrigerator.  It will get funky after a while, so avoid that and extend the shelf life by putting it in the fridge.

Crusty Fish Fillets

Ingredients:

4 4-oz. fillets, such as catfish or flounder or Tilapia
1/4 cup toasted wheat germ
2 Tablespoons finely chopped pecans
1 Tablespoon finely chopped fresh parsley
1 minced garlic clove
1/4 teaspoon salt
1/8 teeaspoon cayenne pepper

Directions:

  1. Preheat oven to 425 degrees F.
  2. Toast the wheat germ in a foil lined pan in the oven, watching closely to avoid burning.
  3. In a pie pan, combine all ingredients except the fish.
  4. Dredge the fish fillets in the mixture.
  5. Bake on a lightly oiled baking sheet for 15 minutes or until opaque in the center.
  6. Serve with lemon wedges.

I flip the fish over after 10 minutes.

Toasted Wheat Germ and Spices
Ready for Baking

Hot from the Oven


Steamed Broccoli

Here is my quick and easy way to steam broccoli. 
I cut up the amount I want to eat.  Wrap it in a paper towel.  Run it under the cold water and wet the toweling.  Place it on a plate and microwave in high for 2 minutes.
Remove it from the microwave, tear it open (be careful because you can get burned from the steam), remove the toweling, season and serve.  You retain all the lovely nutrients , beautiful color and have absolutely no mess to clean up!


Enjoy!

Tuesday, June 21, 2011

Smoked Turkey Sausage Pasta & Veggies

In effort to incorporate more healthy choices in my diet, I purchased some Smoked Turkey Sausage.  I don't recall what I had in mind when I purchased it at the grocery. However, a quick check of the veggie drawer and pantry resulted in this quick and tasty supper.  I used red and green bell peppers because that is what I had handy, but I think this would work equally as well with yellow squash, zucchini, broccoli florets or asparagus.

Smoked Turkey Sausage, Pasta & Veggies

Ingredients:

1 14-oz. package Butterball Smoked Turkey Sausage
1 green bell pepper, seeded, and thinly sliced
1 red bell pepper, seeded and thinly sliced
1 medium onion, thinly sliced
2 teaspoons olive oil
4 oz. spaghetti
1 tablespoon salt
1 teaspoon Mrs. Dash seasoning
1/4 cup fresh grated parmesan cheese

Directions:

  1. In a medium pan, bring water to a boil.  Add 1 tablespoon salt and pasta.
  2. Cook pasta until al dente, about 10 minutes.
  3. While spaghetti is cooking, heat 1 teaspoon olive oil in a large skillet over medium heat.
  4. Slice sausage into bite sized pieces and add to the skillet.
  5. Brown sausage and remove from the pan.
  6. Add remaining teaspoon of olive oil to the skillet.
  7. Add the sliced vegetables and Mrs. Dash seasoning to the pan.  Sauté the vegetables until they are tender crisp.
  8. Add sausage back to the pan and reheat.
  9. Drain spaghetti and add it to the skillet with the meat and vegetables.
  10. Top with grated cheese and toss to mix.
Serve in individual bowls.

Serves 4

Sunday, June 5, 2011

Parmesan-Crusted Chicken Tenders


Chicken is so versatile, you can fix it so many different ways.  I spotted this recipe not to long ago and decided to give it a try and it turned out very well.  The tenders were just that, very tender and they had a nice crispy crust without the mess of frying.

I served it with home prepared honey-mustard dipping sauce, which was nothing more than some Miracle Whip with a little squirt of prepared yellow mustard and a drizzle of honey all mixed up together.    It would also be great with some warm marinara sauce as well, you get to choose....or serve with both!

I served this with the Au Gratin Potatoes (also posted on the blog) and green beans.


Parmesan-Crusted Chicken Tenders

Ingredients:

Canola or olive oil cooking spray
1/4 cup flour
2 large eggs, slightly beaten
1/2 cup finely shredded Parmesan cheese
1 cup coarse dry Italian bread crumbs
1 teaspoon garlic powder
1/4 teaspoon salt
1 pound chicken tenders

Directions:
Preheat oven to 450 degrees F.  Place a large wire rack on a baking sheet and coat with cooking spray.
  1. Place flour in a shallow dish.  Lightly beat the eggs in another shallow dish.  Combine the Parmesan, bread crumbs, garlic powder and salt in a third shallow dish.
  2. Coat each tender in flour, shaking off any excess.
  3. Dip in egg and let any excess drip off.
  4. Roll in the breadcrumb mixture.
  5. Place on the prepared rack.
  6. Generously coat the top of each tender with cooking spray.
  7. Bake for 10 minutes.
  8. Remove from the oven, turn each tender, and coat with cooking spray.
  9. Return to oven and continue baking for 10 additional minutes.
  10. Serve tenders with dipping sauce.